2011-08-17
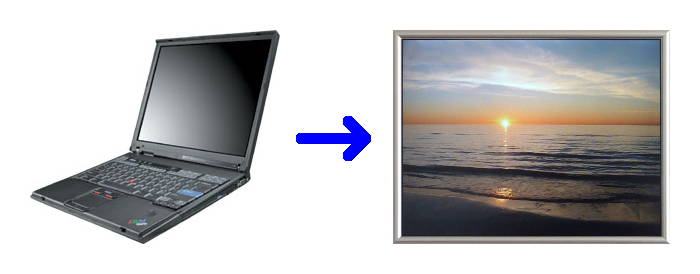
Having browsed the net and searched the stores for a nice and elegant digital picture frame, but never found one that I really liked, I decided to build my own.
I searched the net for DIY picture frames, and found several web-pages doing exactly that. A common thing I didn’t like though, was the thickness of the frames… Anyway, I got inspired, thanks to people who post ideas on the web!
Several DIY picture frames were build from old laptops — Great idea, an old weak laptop is easy to come by, and cheap.
The hardware
The laptop
It happened so that I could get an old Thinkpad T43 2668-F7G with a nice monitor, very cheap.
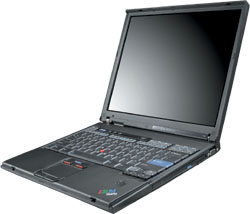
So I now have a system with the following interesting features:
- 15″ monitor – 1400×1050 resolution
- Wireless 802.11abg
- Bluetooth
- USB-bootable
- Network bootable
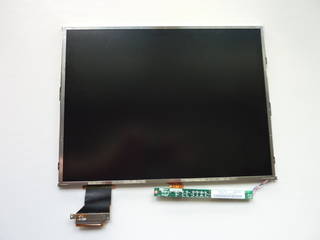
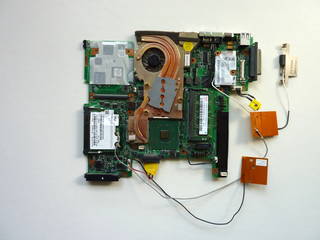
Dismantling the laptop
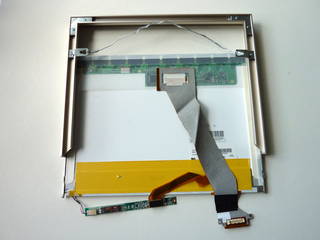
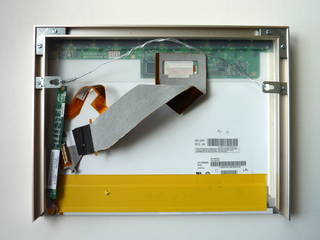
I took the laptop apart, ending up with the motherboard, the LCD inverter and the LCD panel. I kept the two metal brackets on the left and right side of the panel and used them to make the panel fit inside the frame, bending them as needed.
The frame
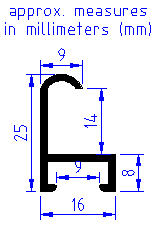
I bought a frame and cut it to fit the LCD panel. The springs makes it possible to fit various panel thicknesses within the 14mm gap – Very handy for this project.
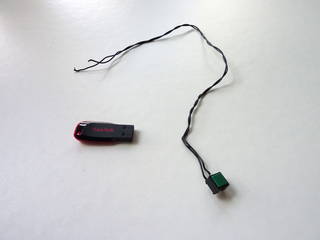
Extras
The only extra needed pieces are the USB stick to boot from, a power button, and two pieces of metal to keep the motherboard in place.
Assembly
Power button
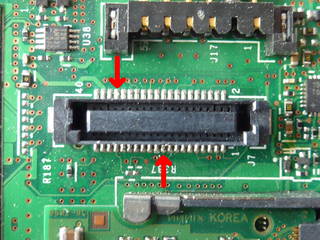
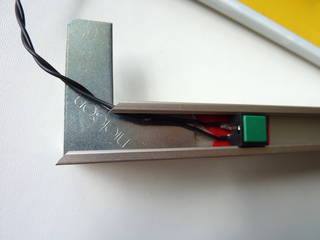
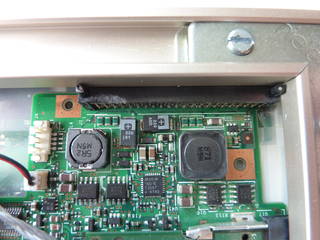
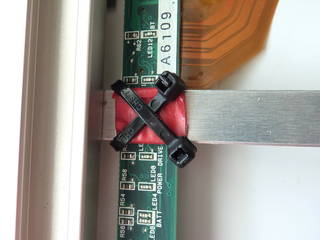
In order to be able to turn on and off the picture frame, we need a power button — We don’t want to have an ugly keyboard hanging around for that. We just need a push button to short the two pins marked on the image of the motherboards keyboard connector.
Note that the top wire should go on the fourth pin from the left, but found that I could solder it onto pin 3 and 4 without causing trouble.

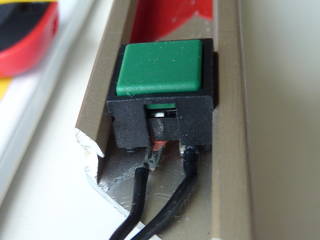
I found a nice-sized push button which can easily be mod’ed to fit behind the frame in a way so it activates by a small push on the front of the frame. Two small rubber-like squares mounted in the bottom corners ensures that the button is released after activation.
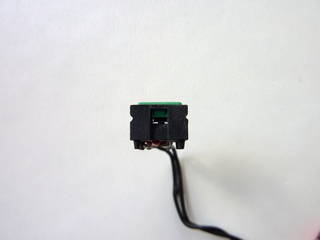
Ensure that the pins and bare wires under the button do not touch the frame. Place a piece of isolation tape on the frame where the button is to be located.
The power button wire has to be routed out from the lower left corner. Use a round file tool to make space for the power button wires to get inside the frame without getting squashed.
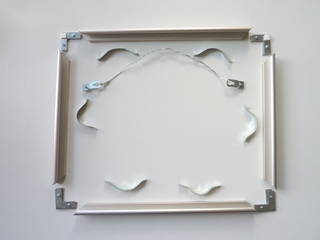
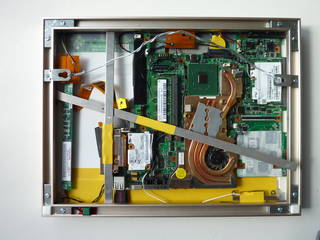
Panel and frame
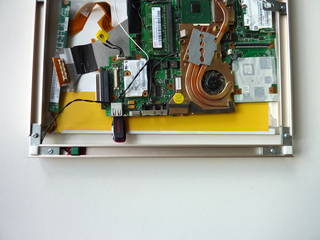
Assemble the top, left and right side of the frame, and mount the string. Slide the panel into the frame, and bend the ribbon-cable as shown on the second picture. The panel has bare metal at the bottom, so some isolation tape is necessary to avoid short-circuits on the motherboard.
Tilt the frame with its top pointing down, and check panel alignment within the frame. If needed, take out the panel and “adjust” the panel side-brackets to get a nice alignment.

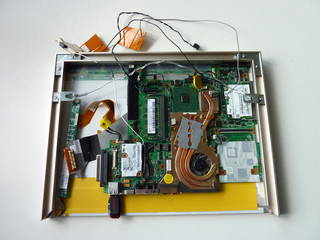
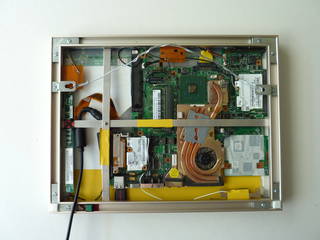
Motherboard
Place the motherboard onto the back of the panel, and slide it up and left. The two pins on the top-left connector has been isolated with some heat shrink tubing. It’s probably not necessary, but better safe than sorry 🙂
Complete the frame
The corner brackets each consist of two angle brackets, one above the other. The screw will separate the two brackets and make a friction lock.
Place the lower bracket into the bottom frame and place the power button wires flat on top. Ensure the wires are laid along the inner edge so the securing screw on the top angle bracket will not hit the wires when fastened. Then slide in the upper bracket and fasten it.
Slide the bottom part of the panel and fasten the screws.
Re-check panel alignment within frame.
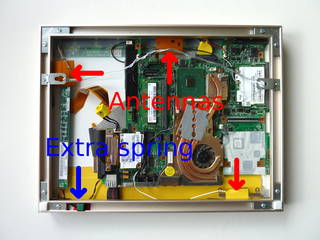
Secure panel and mount wireless antennas
Use the springs to secure the panel against the frame. Put the springs “feet-down”, press down on the top and slide in under the frame hiding.
The two wireless antenna plates are straightened and put in between the springs and the frame. One at the left side, and the other at upper side.
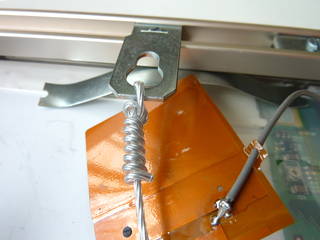
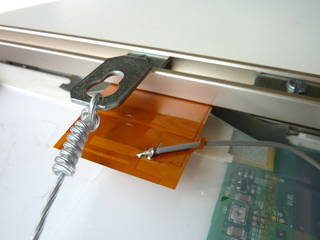
The bluetooth antenna is isolated with tape and placed at the lower right side.

Secure motherboard
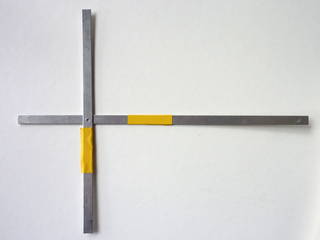
The two metal strips are 2mm x 10mm and cut in length so they will fit in under the frame hidings, one horizontally and one vertically. The position of the holes must be at the location where the power connector is to be placed. The should be isolated where they may touch the motherboard.
They can be put in place without disassembling the frame.
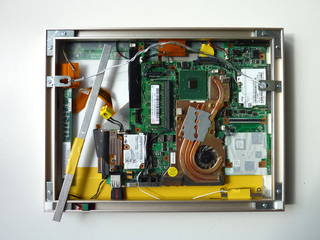
The power connector is placed under the holes at the intersection and fastened with the same screw that held it in the laptop.
Secure the LCD inverter board
The LCD inverter board might generate higher voltages, so be on the safe side and place them isolated.
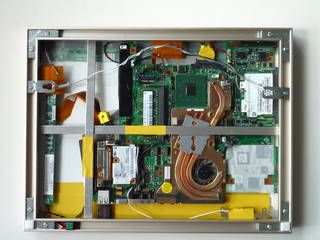
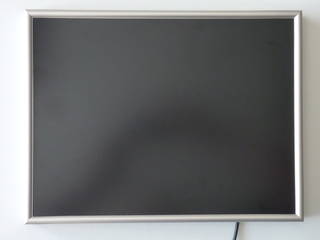
Assembled
Software
I decided to use the “Debian Live” distribution, which is capable of building a bootable image for a USB-stick, and for PXE network boot.
Boot set-up
The system is configured so it will boot over PXE through wired Ethernet if available, otherwise it will boot from the USB stick. This makes it possible to test new set-ups without writing the image to the USB-stick.
Heat and power consumtion
Initially the picture frame generated too much heat to run without fan, and believe me, the T43 fan is not among the more silent types.
After some fiddling with the installation, the system is now able to run without fan. The fan starts during boot, shutdown and very warm days, but normally remains off. CPU and GPU temperatures stay around 60 degrees Celcius. Clocking down the CPU and the GPU solved most of the heating problem, and ThinkFan allowed me to customize the fan behavior.
I measured the power consumption at the wall socket: 25W — A little high considering it runs bare, maybe the power supply is not that efficient?
Picture viewer
I decided to use the “fbi” image viewer which runs from the console using the framebuffer.
The system is made so it displays a fixed set of pre-stored images, until a wireless connection to my image server has been established, after which it starts to show all images available on the server share.
Result

Apart from that hideous power cable I find the result quite nice — At least much better than many digital picture frames found in stores. And this one does what I want!
Next step must be to hide the power cable…
Happy building!